Tools and Materials
Over many years we all establish our own favorite tools for specific tasks, methods to do those tasks, and materials like lubricants, glues, paints, etc that we have come to rely upon. This page documents mine. Many of these have been used in my restoring of HP85 computers.
If you have some that you think I might like to try after reading about what I already like, please let me know, or maybe send me a picture and a writeup in the style of this page, and I can add it to this collection of favorites.
You will find shopping links below to many of the products I have described. These links do not include affiliate links and I receive no compensation for mentioning the products or pointing to where to buy them.
Tools
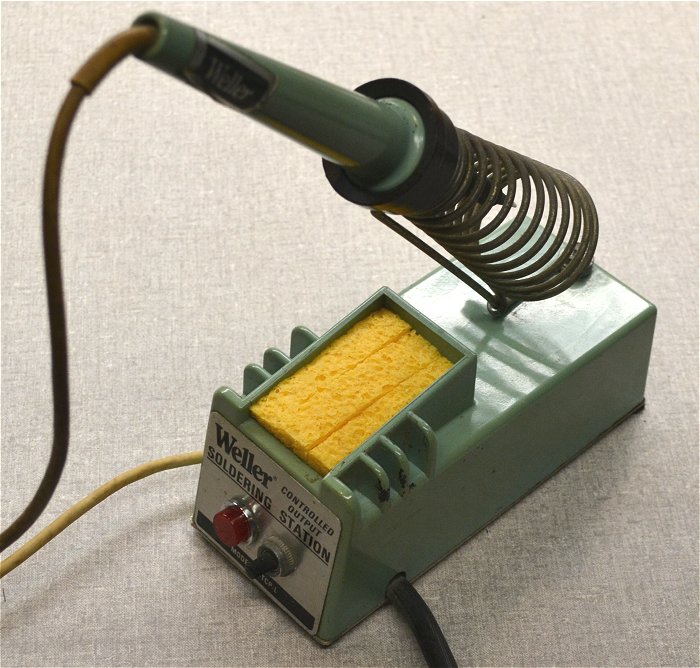
Metcal Soldering Iron
My first soldering iron was a screwdriver held in the flame on the kitchen stove, with motherly supervision and guidance.
Soon after I upgraded to something that was called a soldering iron

and then my first electric soldering iron that I used for about 5 years.
For the next 25 years i owned several Weller soldering irons that had temperature control by swapping the tips.
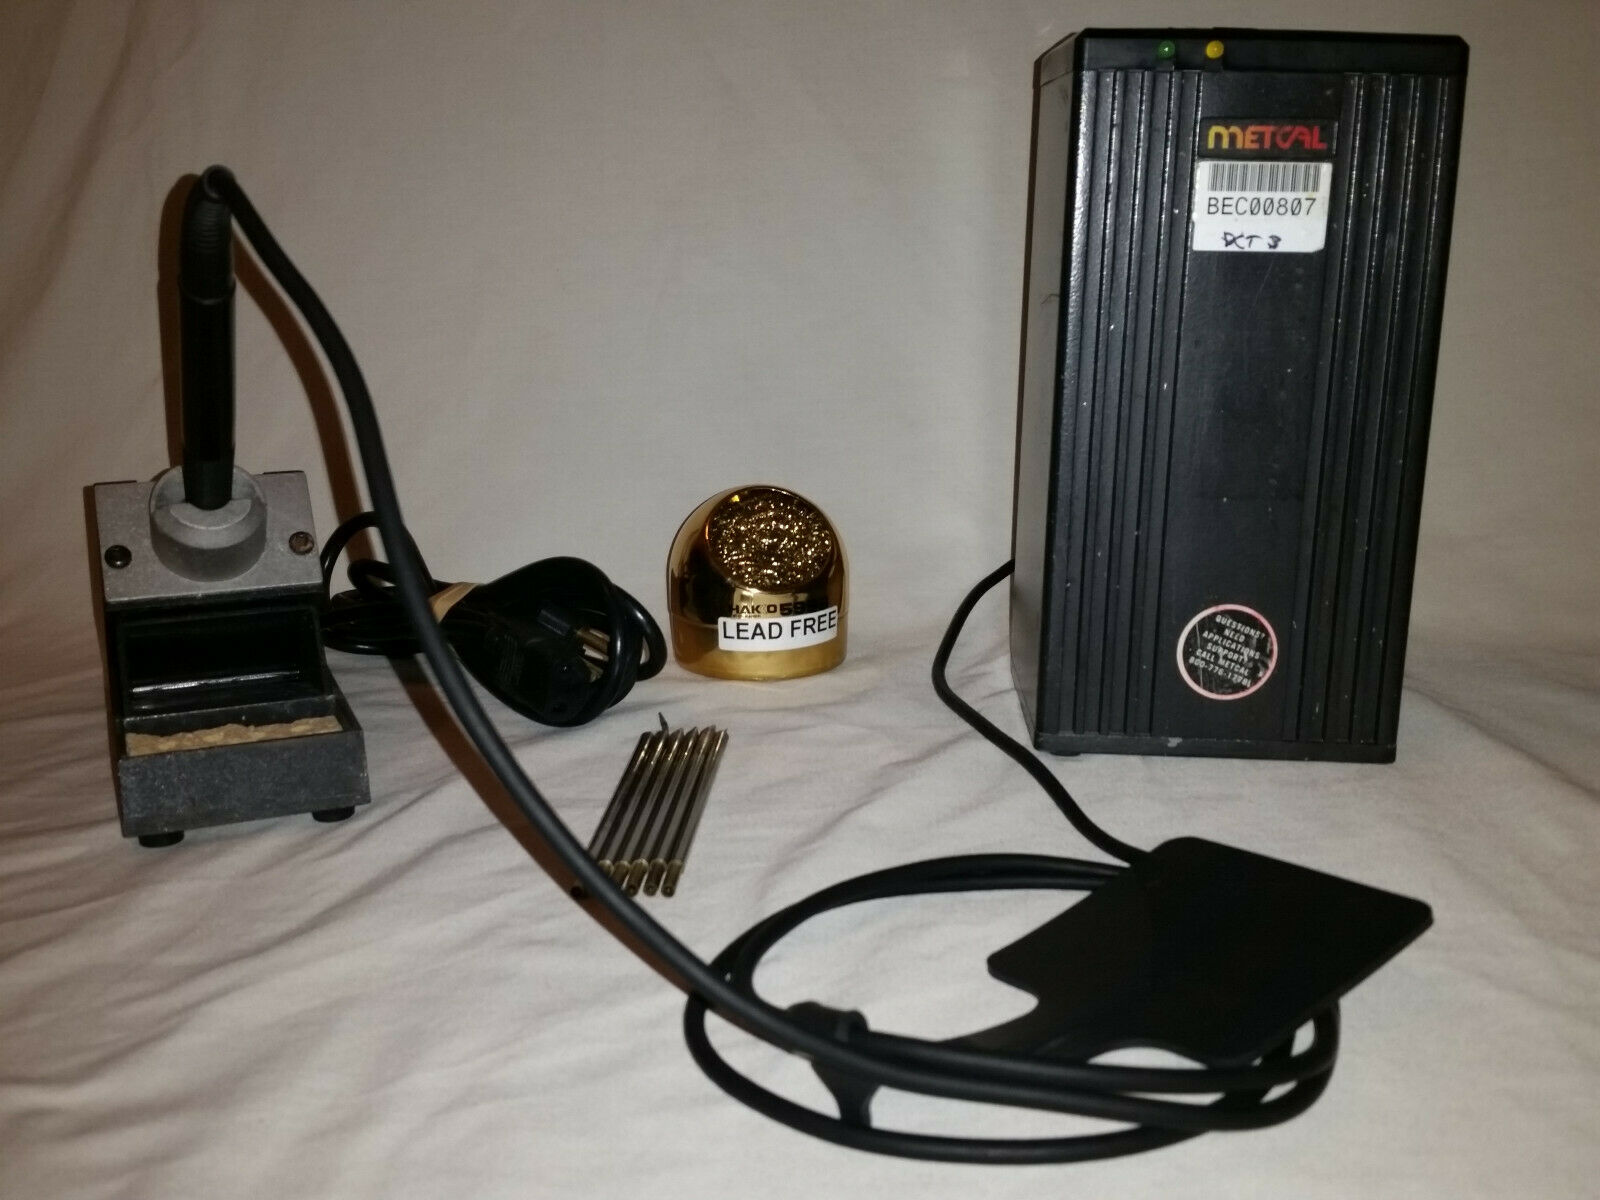
Around 1997 while working as a consultant, I discovered Metcal Soldering irons. My client had much better R&D funds than I did, so these soldering irons at over $700 were not on my radar. The experience of using the Metcal in their lab instantly convinced me that these soldering irons were what I should be using, so I got my wife to buy me one for Christmas.
I have used my Metcal system on a daily basis ever since. They come with
A fairly long power cord from the power supply to the handle, made with insulation that does not burn or melt if accidentally touched by a hot iron.
The handle is extremely light weight
The cartridges (that set both temperature and tip shape) can be changed in seconds without having to screw any collars etc.
Best of all is that they heat up in only a few seconds, and maintain their temperature even when switching from soldering small components to soldering to a ground plane.
Second hand systems can be found on eBay for about $100 to $150. My favorite tips are
STTC-106 for SMT components
STTC-137 for general soldering
STTC-117 for plumbing.
With practice, and a good stereo microscope, I can solder 0.5 mm QFN packages, all SOIC packages, and 0805, 0603, and even 0402 resistors and capacitors. The only parts I can’t solder with my Metcal are BGAs and packages that have pads that are hidden underneath.
New cartridge are $15 to $25 depending on style. They can often be found on eBay cheaper.
If this has piqued your interest, I recommend you find one to play with and see if it is right for you. I wouldn’t want you spending the big bucks based only on my recommendation.
Number 6 Titanium Tweezers
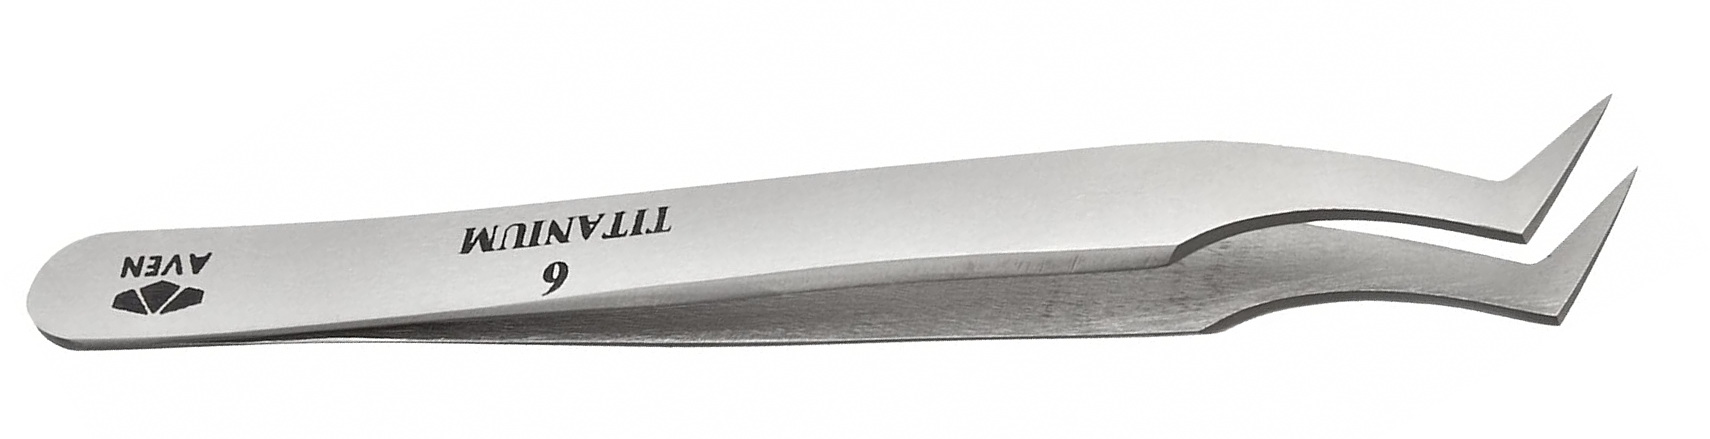
I use these tweezers to hold surface mount parts like 0603 and 0402 resistors and capacitors. Titanium has 3 advantages over more common steel tweezers
Lighter weight
Titanium is a poor conductor of heat, so these tweezers do not heatsink the solder joint if the tweezers are holding the component lead. This means better solder joints
Electrical soldering alloys (both Tin/Lead and ROHS SAC) don’t interact with the Titanium, so you don’t have problems of getting solder adhering to the tweezers
Reverse Tweezers
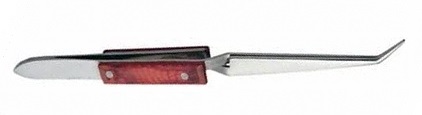
I use these tweezers to hold small parts and wires when soldering. Unlike normal tweezers, these are normally closed with some spring pressure from the handle. You squeeze the handle to open the jaws. Excellent to hold wires while tinning, or small components when you need an extra hand or two.
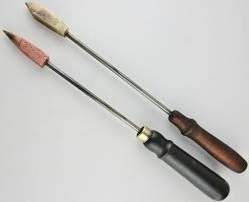
Pointy Probe

These can be bought individually or as part of a set under the common name of
Straight stainless steel dental pick
Dental pick set
Search on Google, Amazon and eBay for examples.
Swann Morton Scalpel Handle number 3
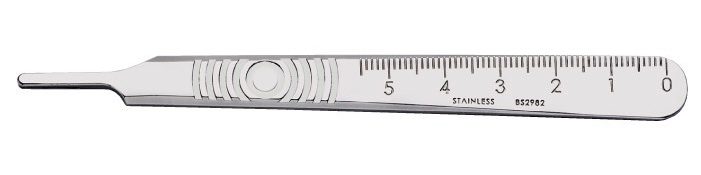
If you live in America, you probably have used many X-Acto handles and blades. Sometimes also called a Hobby knife. Here is a video a video to confirm your choice:
I’ve discovered something that for my precission cutting is far superior: Surgical scalpels and the matching locking handles. And here is someone else who also has found them superior:
Swann Morton Number 11 Scalpel Blades
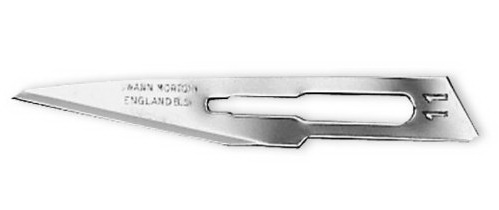
To go together with your Swann Morton Scalpel Handle number 3 you will need some blades. My favorite is the Number 11 blade. A pack of 100 will cost about $30 , $0.30 per blade. Please be careful, these blades are very sharp and are designed specifically to cut humans.
Self-Locking, Stainless Steel Hemostat With Smooth Jaws
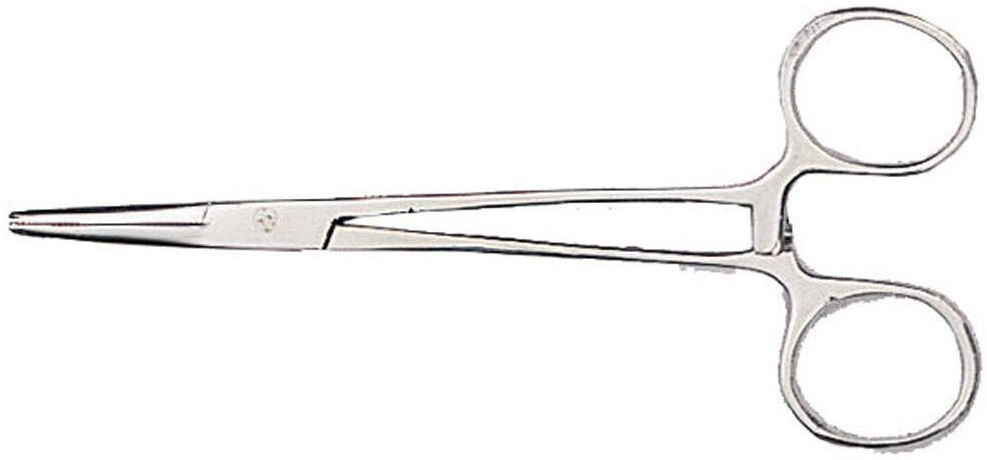
These are just like normal Hemostats (Forceps) except that there are no teeth on the surface of the jaws. This makes them a good choice for holding wires while removing insulation.
Hakko FR-301-03/P Desoldering Tool
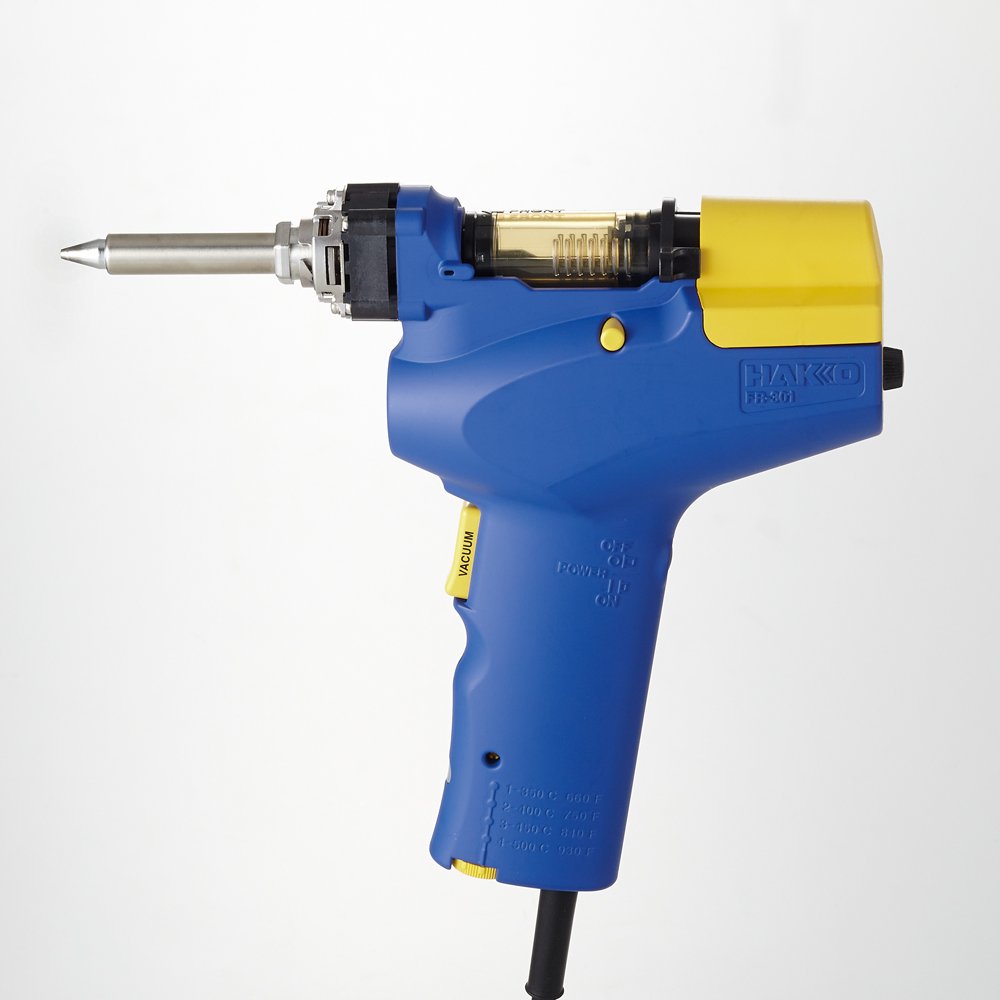
This tool is as good a desoldering tool as the Metcal is a soldering iron. It is very well made and the internal vacuum pump is sufficiently strong to remove solder reliably from through hole PCB connections. Unfortunately, it is rather expensive.
If this has piqued your interest, I recommend you find one to play with and see if it is right for you. I wouldn’t want you spending the big bucks based only on my recommendation.
Desoldering Pump (Solder Sucker)
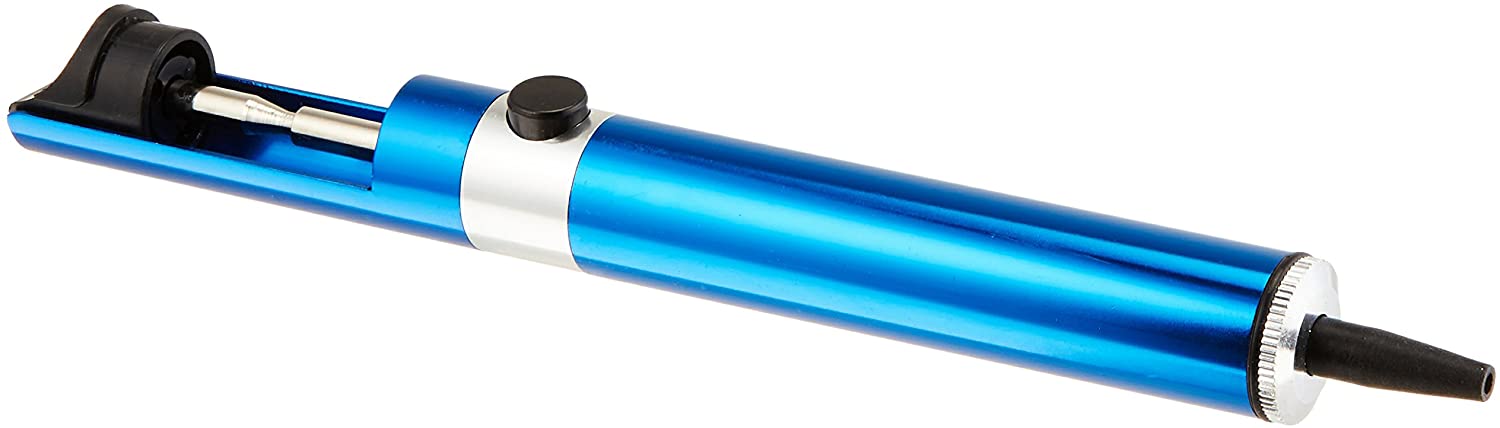
Solder Pumps are another common tool. I rarely use them because of the way they operate. They use a spring loaded plunger that when the trigger is pressed causes the plunger to move rapidly away from the tip and create an inrush of air and liquid solder at the tip. The solder tends to turn into a fine powder inside the tube. When the plunger hits the stop at the end of its travel, it causes a mechanical shock that can cause the fine solder powder to fall out of the tip and onto your board or into your system. Solder powder can also come out when the plunger is pressed in for another cycle. Depending on the material of the barrel of the tool and the sealing material on the plunger that slides against the inside of the barrel, some tools can generate high voltage static. I recommend using solder wick instead.
Keycap Puller
Materials
Loctite 4014

Loctite 4014 is a medical grade Cyanoacrylate adhesive with very low viscosity (very runny like water, 1 to 5 cp @ 25 degrees C) and it has good wicking behavior. The recommended gap size is 50 microns / 0.002”, so it does not work well with very rough surfaces. Least expensive here RS Hughes 4014, but also available at Amazon etc.
Cyanoacrylate Shelf Life
Most of the Cyanoacrylate glues I have used are consumer products sold in small 0.7 oz / 20 gram tubes/bottles. Usually the glue dries out before it is all used, the nozzle gets clogged, and/or the glue turns into much higher viscosity. In the past I learned that keeping Cyanoacrylate glue in the fridge (not the freezer) can extend the shelf life considerably. Since Loctite 4014 is more a expensive non-consumer grade product, I have always kept mine in the fridge (about 4 degrees C). The results are very encouraging. All the repairs described in these pages that use this glue, used a bottle I bought around 2012 and had an expiry date of 2013. This article was written in January 2020 and the 4014 still has very low viscosity, and seems to work as good as originally.
My understanding is that Cyanoacrylate glues harden in the presence of tiny amounts of water, such as the ambient water on the surfaces being glued being in an environment that is not at 0.0% humidity. So normal usage environments already have the required moisture on all part surfaces. 4014 is designed to harden and be used at temperatures around room temperature. (I am guessing the chemical reaction between moisture and glue that causes it to harden, is slower at lower temperatures)
Given this understanding, minimizing the surface area of the glue in a bottle exposed to air (keep it upright), and minimizing recirculating air bringing more moisture into the glue bottle environment, will help extend the life of the glue. So I keep the bottle of 4014 in a sealed zip lock bag. If you invert the bottle to dispense the glue, the surface area of the liquid will cover the rest of the inside of the bottle and the dispensing tip. I avoid doing this. Instead, when I need some 4014 glue, (usually in very small amounts) I will unscrew the whole conical top of the bottle, and dip a thin probe into the fluid to get just one drop of glue. Remember to replace the screw on top, and return to the fridge when convenient.
Due to Cyanoacrylate glues being particularly effective at gluing fingers and hands to unintended surfaces, placing it in a fridge may be hazardous depending on who accesses the fridge and their understanding of these dangers. The container that holds the zip lock bag and the zip lock bag itself should both be marked with appropriate warning labels. I would not recommend this storage for a household with children, or adults with poor impulse control.
Loctite 4061
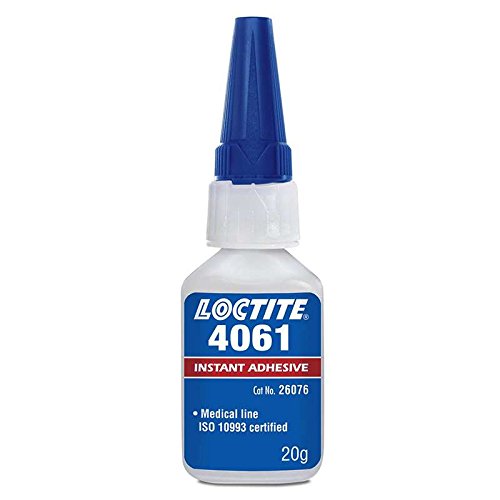
Loctite 4061 is a medical grade Cyanoacrylate adhesive with higher viscosity than 4014 (10 to 30 cp) and it has good gap filling behavior. The recommended gap size is 50 microns / 0.002”. It works better with rough surfaces than 4014. Least expensive here RS Hughes 4061, but also available at Amazon etc.
I handle my 4061 the same way as my 4014 Cyanoacrylate Shelf Life
J-B Weld 5 minute Epoxy 50240H
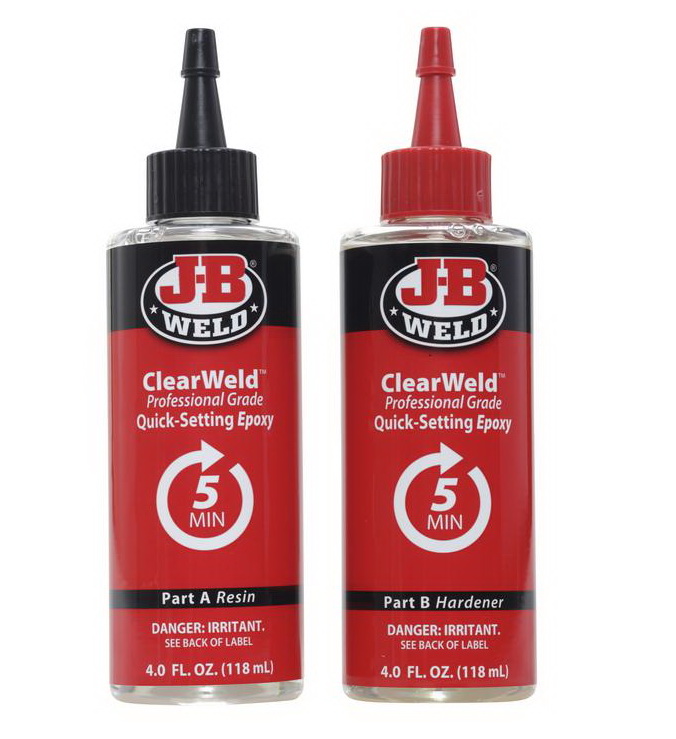
There are many 2-part epoxies available and I tried about 6 of them before settling on this fast setting product for the task of modifying the green Stackpole plungers for the HP85 keyboard. I found that although it is described as a 5 minute epoxy, it can take several days to complete hardening. I did find that its workable time is about 5 minutes, and if you spend 1 to 2 minute thoroughly mixing the two parts, that leaves you 4 minutes to apply the mixture and position things correctly. It is very important to use equal parts of the resin and the hardener. For the keyboard plunger modifications, I was mixing quite small quantities of just 1 drop of each component. If you have too much hardener in the mix, the result is that it never really hardens, which is counter intuitive. If you have less hardener, it will harden, but will take longer to reach final hardness. I recomend experimenting/practicing dispensing a single drop of each, including deliberately using 10% to 20% more of either component. I use old credit cards et cetera as my mixing surface. This item is 8 fl. oz. total, I used about 1/2 fl. oz. total to modify about 50 Stackpole plungers, including multiple screwups and re-do’s. I found that if I set up 3 plungers for modification, and I mixed 1 drop of each component, I would have about the right amount of mixture to complete the 3 plungers, and after the fiddling around of applying the mixture to the 3 plungers, the 4 minutes of working time was about complete. If you run out of mixture or time, don’t try a partial repair. Just mix up more more epoxy. The short working time of this product ended up being the critical requirement for the plunger modification, due to the need to get everything positioned just right. The other products I tried with longer working time would require constant attention to maintain positioning while waiting for the hardening to reach a sufficient level to where things don’t “move on their own”.
These are the other Epoxies I tried, and while they are probably fine products, they were not as good as JB Weld 50240H for this specific application.
J-B Weld Original Epoxy 8265-S
J-B Weld Plastic Bonder 50133H
Devcon Plastic Steel Epoxy S-5/52345
Devcon 2 Ton Epoxy S-35/35345
Hot Melt Glue
Double sided tape
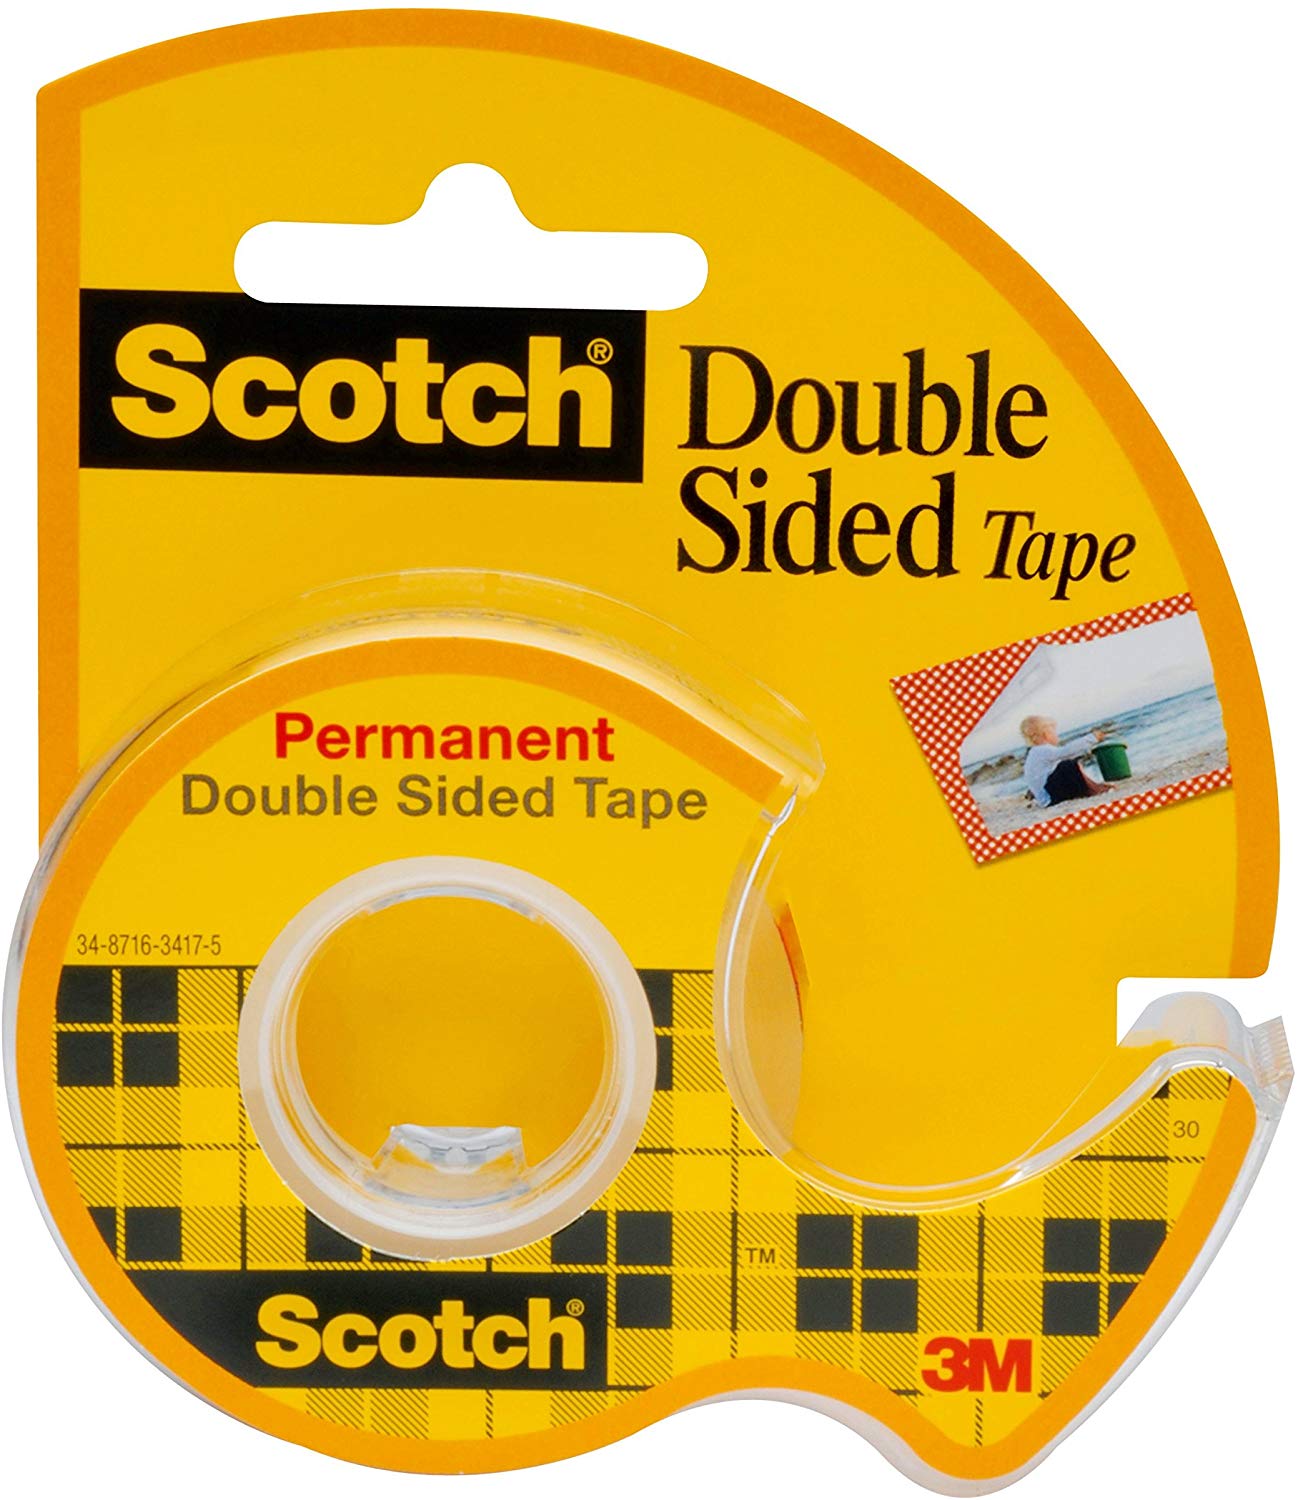
I use this type of double sided tape when machining very delicate things on my milling machine.
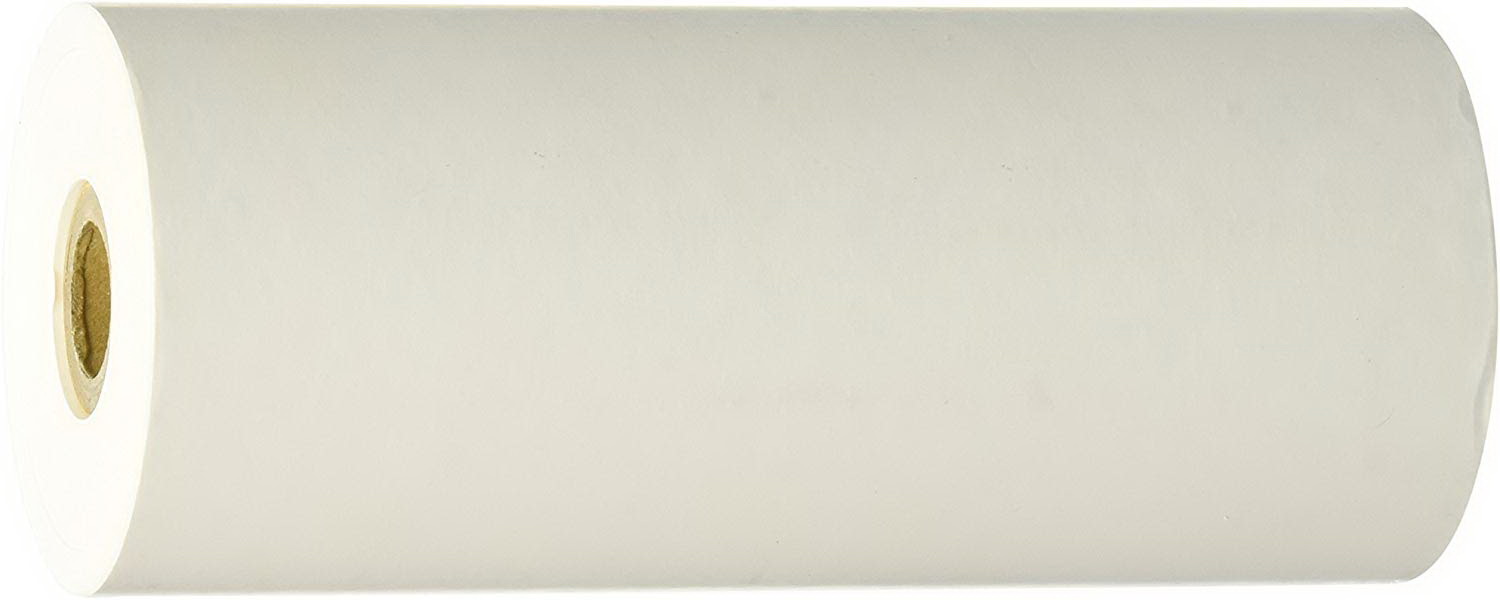
Thermal Paper
The HP thermal paper is 4.22” to 4.23” wide. 107 mm
Since the paper drive rollers are on the left and right side, paper that is too narrow does not work. I have confirmed that 4.00” paper that seems to be readily available is too narrow
I found the following thermally sensitive printer paper at a not outrageous price on Amazon. Thermal Paper at Amazon Every thing else I found for things like receipt printers is too narrow. This paper is slightly too wide, so I trim the roll to the correct width of 4.230” on my lathe, using a Swann Morton Scalpel Handle number 3 and Swann Morton Number 11 Scalpel Blades. The length/diameter of this product is significantly less/smaller than the original HP paper rolls. The trimming process is shown here Seiko Paper